Disclaimer: As an affiliate I may earn a commission on any qualifying purchases, including those from Amazon.com, at no extra cost to you – read more.
Switching to a hammock can be a little daunting, but I can assure you it will be worthwhile learning a few new skills and techniques once you get used to it.
If you’re a newbie among us, I’ve put together this ultimate guide full of tips and tricks for those starting on their hammock camping journey. I’ll also answer a few frequently asked questions at the end.
- Hammock Camping Tips
- 1. Choose the correct hammock
- 2. Pick a safe camping spot with windbreakers
- 3. Ensure you have a hanging distance at least 2 feet longer than your hammock
- 4. Bring all the correct gear
- 5. Travel as light as possible
- 6. Choose straps or whoopie slings to avoid knot tying
- 7. Get the right sag of 30°
- 8. Ensure you’re lying in the optimal diagonal position
- 9. Stay warm in your hammock
- 10. Keep the bugs away
- 11. Stay dry in your hammock
- 12. Don’t share a hammock
- 13. Find a good spot to store your gear
- 14. Leave no trace
- 15. Clean your hammock regularly
- 16. Get a hammock at home
- Related Questions
Hammock Camping Tips
Here are my 16 best tips for hammock camping:
1. Choose the correct hammock
Before you even consider getting out into the wild, you’ll be purchasing your hammock. (If you already have one, then skip to the next tip).
It’s important that you get a dedicated camping hammock as these are strong, lightweight, and compact when packed away. Unlike a traditional hammock, these will be made from a synthetic material such as nylon or polyester.
I tend to prefer nylon as this is stronger and slightly softer. However, there’s also a case for polyester since it is fast drying and often found in cheaper camping hammocks.
My go-to hammock that I use for camping is my ENO. You can choose from a SingleNest or DoubleNest depending upon how much space you like. I use the DoubleNest which is the same length but slightly wider to give you more material for finding a good lying position.
2. Pick a safe camping spot with windbreakers
Choosing a good spot is an often-overlooked factor among newbies but it’s actually one of the most important steps to ensure you are safe whilst camping.
Here are some tips for choosing a good spot to hang your hammock:
- Look for sturdy trees. There is no perfect diameter for trees as the strength varies by species but a good minimum to look for is 6 inches.
- Look for windbreakers. These are things such as large bushes, rocks, cliffs, or any other natural object that can protect you from the wind. Not only does this reduce the wind chill but also the impact of side rain.
- Avoid widow makers. A window maker is a term affectionately coined by the hammocking community for dead branches overhead that could fall in the event of a storm and cause considerable damage. It goes without saying that these should be avoided.
- Avoid animal paths. Animals tend to follow the same routes, if there are signs that animals have been using the trail then look elsewhere to avoid the risk of a run-in.
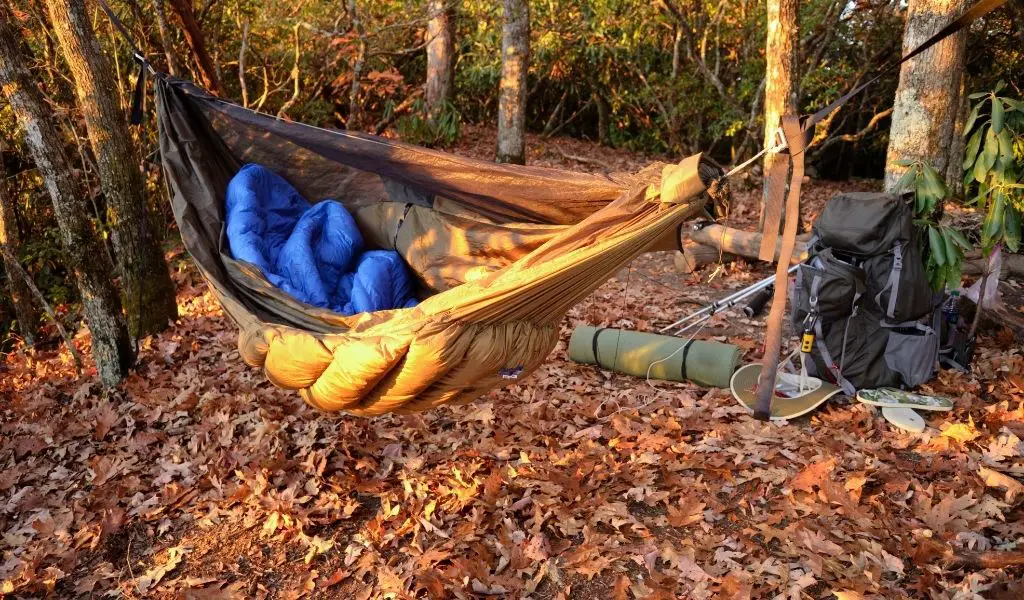
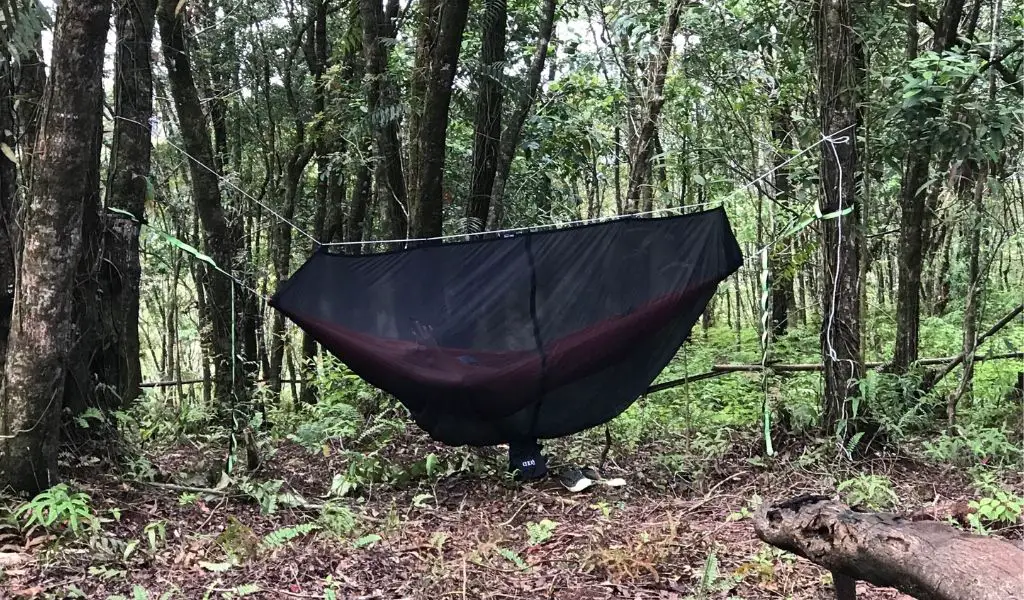
3. Ensure you have a hanging distance at least 2 feet longer than your hammock
Choosing a good spot is only half the battle, you also need to ensure that you have an optimum hanging distance. This might sound like a lot of things to remember, but after you’ve done it a few times it becomes second nature.
For a typical camping hammock with a gathered end, you’re going to want to ensure the distance between the trees is at least 2ft longer than the length of the hammock, but ideally 3-4 feet.
This image shows the optimum hanging distance based on the length of your hammock.
If you have a hammock with a spreader bar (such as the ENO Skylite), there are slightly different best practices because they have less natural sag and require a more taut setup. For spreader bar hammocks, the distance between the trees should be equal to the length of the hammock.
For more tips, see my dedicated article on the best hanging distance for hammocks.
4. Bring all the correct gear
Aside from your hammock, there is a huge list of other items that you need to remember to bring with you from the suspension to insulation.
The location and timing of your trip will determine exactly which gear you need. For example, camping in a rainforest in winter will require totally different gear to camping at a campsite during summer.
I’ve put together a full hammock camping gear checklist which is ideal for first-timers but I’ll also talk about some of the equipment later in this article under tips 9, 10, and 11.
5. Travel as light as possible
This tip might seem like it’s at odds with the previous tip but hear me out. If you’re backpacking and will be walking long distances, it’s important to minimize the weight of your gear.
This means only taking the essentials (no luxuries such as books or electronics) but also making sure you have the lightest possible gear.
When purchasing your gear, pay attention to the weight and look for insulation that uses down filling instead of synthetic, this has a much better efficiency per gram. As for your hammock and tarp, nylon is known for its strength-to-weight ratio so it’s usually lighter than polyester.
If you’re really trying to shed the lbs, try Dyneema fabric but this will cost you a lot more.
Some other lightweight packing tips include sharing as much as you can, consuming your heaviest food first, and taking items that have many uses such as utility tools (a.k.a. swiss army knife).
A good phrase in the lightweight packing community is ‘pack everything you think you’ll need, then get rid of half of it’.
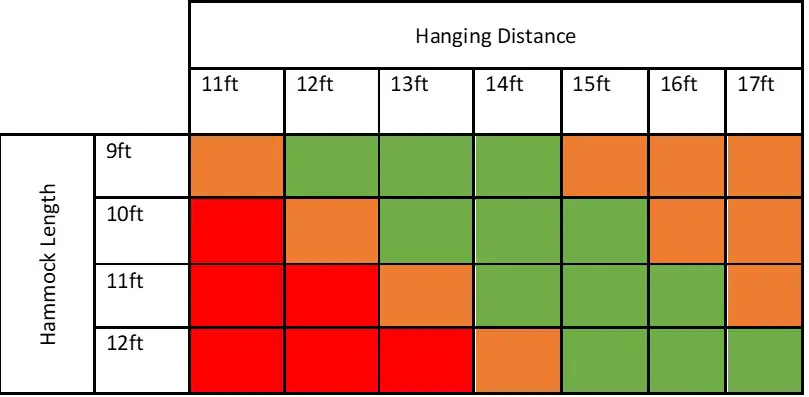
6. Choose straps or whoopie slings to avoid knot tying
If you’re a beginner moving from tent camping to hammock camping, the idea of tying knots to hang your hammock can be a little daunting. However, it doesn’t have to be with newer suspension systems that replace the old rope and knot system.
You can hang your hammock without tying a single knot with hammock straps. These straps are typically made from nylon and feature daisy chain loops. You can simply wrap them around a tree and lock your carabiner in place.
If you’re trying to adhere to being a lightweight backpacker as in the previous point, you can also try whoopie slings. Again, there is no knot tying as you pull the loop through the spliced choker to secure it in place. This takes a little more practice but they are around half the weight of a strap and take up less room.
7. Get the right sag of 30°
Next, we’re on to hanging your hammock. It’s key to ensure you have the right level of sag, this is the angle at which it hangs.
You don’t want to hang the hammock super tight between the trees. Instead, it should hang at a 30° angle, like a smiley face. This ensures you have enough material to find a good position and lowers the center of gravity so you are less likely to fall out.
If you are struggling to find trees that are optimal distance apart, you can use a structural ridgeline to maintain the correct sag whilst hanging over a longer distance.
See my full guide to using a hammock ridgeline for information on this.
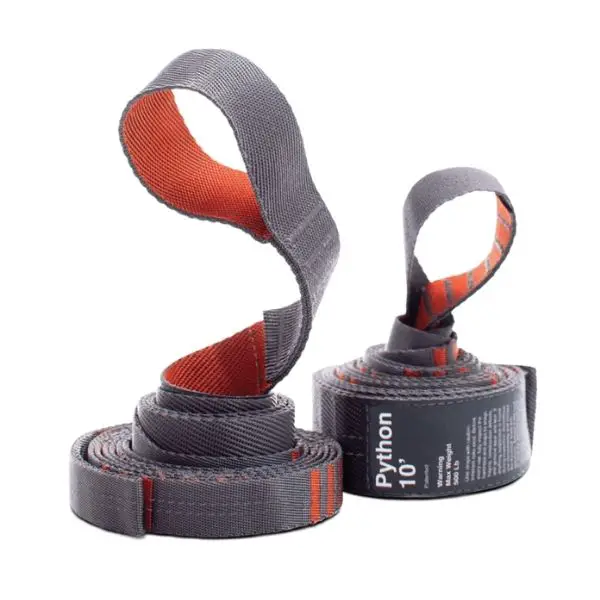
8. Ensure you’re lying in the optimal diagonal position
Many people who try a hammock for the first time don’t realize that the correct way to lie in it is diagonally across it and not directly down the centerline.
Lying diagonally in a hammock allows you to find a flat position that’s better for your posture rather than a banana-like position that you’ll achieve if you lie parallel with the hammock’s centerline.
9. Stay warm in your hammock
If you’ll be camping out in winter, it’s important to take steps to stay warm in your hammock.
For this, you’ll need the correct insulation that’s rated down to the temperatures you’ll be staying in. The main insulation you’ll need is:
- Underquilt – An underquilt hangs below your hammock and is cinched tightly to it, creating a pocket of air that insulates your back from the wind chill. Some people use a sleeping pad instead of an underquilt but I prefer the latter.
- Top Quilt – Whilst an underquilt keeps your back warm, a top quilt keeps your front warm. These are similar to a camping blanket, however, they are shaped for a hammock and tend to have a foot box that keeps your toes nice and snug.
- Hammock-Compatible Sleeping Bag – An alternative to the top quilt and underquilt combo is a hammock sleeping bag. Unlike a regular sleeping bag, these are designed to wrap around your hammock creating a cocoon.
10. Keep the bugs away
Sleeping in a hammock leaves you much more exposed than a tent so the mosquitos might think they have an easy feast. However, that’s where a bug net comes in.
These go around the outside of your hammock using the same suspension so they are super easy to hang. There are many different types to choose from as you’ll see in my guide to the best bug nets for hammocks.
I recommend getting one with a J-shape side zipper rather than a horizontal zipper as these are much easier to get in and out of.
An alternative is to try a jungle hammock which will have a built-in bug net. However, I tend to prefer using separate kit because the built-in bug net leaves me feeling a little trapped as you can’t sit upright.
11. Stay dry in your hammock
Staying warm is just one part of the equation, you’ll also need to stay dry.
This is why a hammock tarp is an essential piece of gear. The size and shape of your tarp (also known as a rain fly) will depend on the conditions you’ll be facing.
Tarps come in four different styles; asymmetrical, hexagonal, square/rectangle, and winter tarps with doors. These are ordered with asymmetrical suitable for the lightest conditions and winter tarps for extreme conditions.
For most beginners, I’d recommend a hexagonal tarp which offers a nice balance between coverage, weight, and ease of use.
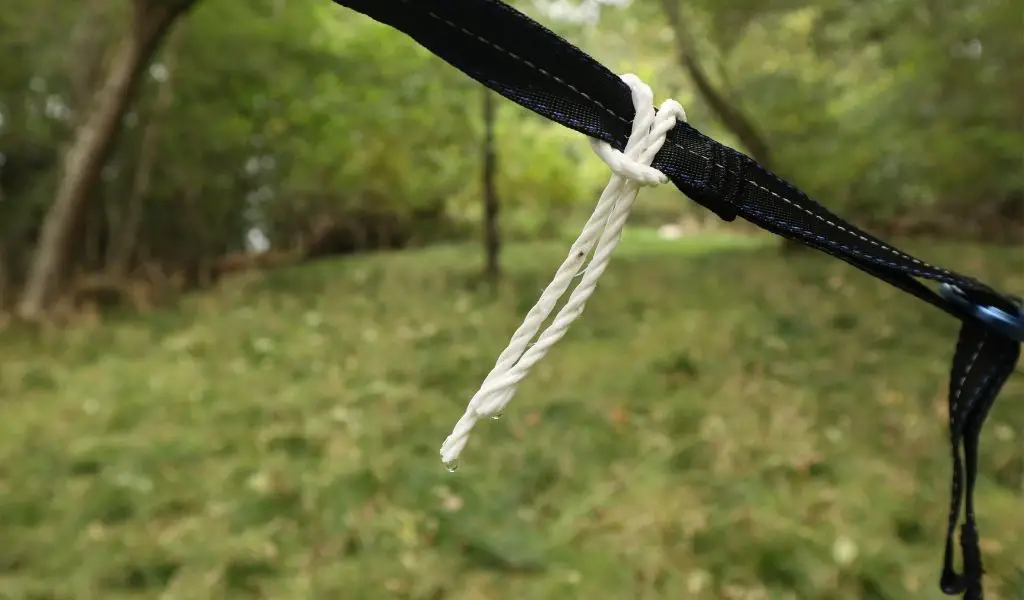
Another hammock camping tip is to use drip lines on your suspension. These are small pieces of cord or rope that stop water from running down your suspension and into your hammock as shown in this image.
Check out my full guide for more tips on staying dry in your hammock.
12. Don’t share a hammock
Thinking of cuddling up with a partner in your hammock, think again. Two people sharing a hammock is a fast track to a sleepless night.
Unlike a bed, a hammock has a strong center of gravity that will push you towards each other resulting in a very uncomfortable experience, take it from someone who has tried.
If you’re looking for a bit of romance in a hammock, then this can totally work. But when it comes to getting some shut-eye, I advise one person per hammock.
If you want to feel close to one another, try a tandem bar such as this one from ENO that allows you to hang your hammocks side-by-side. You can also share a tarp doing it this way to reduce the weight of your gear.
13. Find a good spot to store your gear
One of the most common questions that I’m asked about hammock camping is where to store your gear. During dry weather, it’s absolutely fine to leave your backpack and boots on the floor next to your hammock, although I’d recommend anchoring them down with a peg.
However, if you want something a bit more weather resistant and safe from any animals that might wander past in the night, here are a few suggestions:
- Attach to Your Hammock Suspension – Push the top handle of your backpack through the carabiner and secure it with a stick.
- Attach Your Gear to a Tree – Carry a spare strap and attach your backpack to a nearby tree. You’ll need a rain cover for this option as it will be away from your tarp.
- Use a Gear Sling – Use a gear sling such as the ENO Gear Sling to hang your gear alongside your hammock.
I’ve put together a full guide to storing your gear whilst hammock camping with photos from my setup and tips on storing your boots too.
14. Leave no trace
The ‘Leave no Trace’ principles are a long-standing set of rules that allow us to enjoy the outdoors whilst minimizing our impact.
If you’re a considerate person, then most of these should come naturally. The principles are:
- Plan Ahead & Prepare
- Travel & Camp on Durable Surfaces
- Dispose of Waste Properly
- Leave What You Find
- Minimize Campfire Impacts
- Respect Wildlife
- Be Considerate of Other Visitors
You can find out more about the Leave no trace principles on their website here.
15. Clean your hammock regularly
After each camping trip, it’s important to clean your hammock when you get back home to prevent any mold or mildew build-up whilst it’s stored away until your next trip.
For light dirt, you can hand wash it in a sink or bathtub with cool water and some detergent.
If it’s going to need a little extra work (or if you’re lazy like me), you can stick it in the washing machine. Again, you’re going to want to use a small amount of detergent and put it on at the lowest temperature.
I wouldn’t recommend putting it in with other laundry, just wash the hammock on its own using a quick cycle and hang it up to dry afterward.
16. Get a hammock at home
Once you get into hammock camping, it will be hard to turn back and you’ll end up becoming a hammock addict like me (maybe you’ll even start a hammock blog!).
At this point, why not get yourself a hammock at home. The types of hammocks for your backyard are different from those that you’d use whilst camping. They tend to be made from thicker and more comfortable materials such as cotton.
If you don’t have trees at home, you can invest in a hammock stand that can be used indoors or outside and easily put away during the colder winter months.
Related Questions
Is It Better to Camp in a Tent or a Hammock?
Both tents and hammocks have their pros and cons so your choice will depend upon your own needs. In my slightly biased option, hammocks are better than tents because they are more comfortable, easier to set up, more compact, and allow you to watch the stars while you sleep (provided you don’t have a tarp set up).
Is Hammock Camping Safe?
Yes, hammock camping is safe and many people successfully use their hammocks in the wild or at campsites each year with no trouble. However, as with all types of camping, it comes with dangers such as wild animals, poisonous plants, and fire safety.
If you follow best practice safety advice along with the tips in this article for selecting a good spot, you’ll have no problems.
